It’s time to code!
In the previous part, we created and set up our new iOS project, decided on an architecture, and defined our initial folder and file structure. Now let’s show the MVVM pattern in action by implementing a simple login screen.
We need to implement the following files in order to make this happen:
Let’s start with the view. Since we are designing a screen, we will create a file called LoginScreen and put it in the Screens folder of our Login feature. It should look like this:
import SwiftUI

struct LoginScreen: View {

    @ObservedObject var viewModel: LoginViewModel = LoginViewModel()

    var body: some View {
        VStack {

            Spacer()

            VStack {
                TextField(
                    "Login.UsernameField.Title".localized,
                    text: $viewModel.username
                )
                .autocapitalization(.none)
                .disableAutocorrection(true)
                .padding(.top, 20)

                Divider()

                SecureField(
                    "Login.PasswordField.Title".localized,
                    text: $viewModel.password
                )
                .padding(.top, 20)

                Divider()
            }

            Spacer()

            Button(
                action: viewModel.login,
                label: {
                    Text("Login.LoginButton.Title".localized)
                        .font(.system(size: 24, weight: .bold, design: .default))
                        .frame(maxWidth: .infinity, maxHeight: 60)
                        .foregroundColor(Color.white)
                        .background(Color.blue)
                        .cornerRadius(10)
                }
            )
        }
        .padding(30)
    }
}

struct LoginScreen_Previews: PreviewProvider {
    static var previews: some View {
        LoginScreen()
    }
}
Nothing too fancy here; we are just creating a view with two text inputs. The first one is for our username, and the second one is for the password, which is why we are using a SecureField instead of a TextField for our password input.
The references to our view model are particularly interesting. You can see that we are creating a LoginViewModel, which has the ObservedObject property wrapper. So, if our view model changes in any way (for example, if the value of one of its state variables changes), the LoginScreen will be redrawn with the new values. As simple as that. That’s the power of declarative programming!
Note how we don’t define the username and password variables in our LoginScreen, but we pass them to the text input fields from our view model instead. LoginViewModel handles all the logic, while LoginScreen only shows the user interface and does nothing else.
Finally, see how the Login button is defined to call the viewModel.login function when it is pressed. That function will also be defined in our view model.
Since we added some new localized strings to our screen, let’s update our Localizable.strings file so it has our English translations. We can remove the old ContentView.WelcomeMessage entry that we entered earlier since we will not use it anymore. Here’s what our Localizable.strings will look like:
"Login.UsernameField.Title" = "Username";
"Login.PasswordField.Title" = "Password";
"Login.LoginButton.Title" = "Login";
Now is the time to implement our view model. Create a file called LoginViewModel in the ViewModels folder:
import Foundation

class LoginViewModel: ObservableObject {

    @Published var username: String = ""
    @Published var password: String = ""

    func login() {
        LoginAction(
            parameters: LoginRequest(
                username: username,
                password: password
            )
        ).call { _ in
            // Login successful, navigate to the Home screen
        }
    }
}
Our view model needs to be an ObservableObject in order for the LoginScreen to be re-rendered whenever any of the Published variables change their state. The login() function will have two main tasks: to send an API request to the server via the LoginAction, and to navigate the user to the home screen if the request succeeds.
Note: We will not implement the navigation part at the moment. For now, we will focus on the API request and come back to the navigation later!
We can see that our parameters will be encoded in JSON using a structure called LoginRequest. Luckily, Swift has a handy protocol called Encodable that can easily do this for us. We only have to define our request model. So, let’s create a new file called LoginRequest and put it in the Models folder.
import Foundation

struct LoginRequest: Encodable {
    let username: String
    let password: String
}
Encoding this structure will create the following JSON request payload:
{
    "username": "YOUR_USERNAME",
    "password": "YOUR_PASSWORD"
}
Nice! Now let’s think about the response. When we receive a response from the server, we will need to decode it from JSON to a structure that we can work with. We will use the Decodable protocol for this. Let’s assume that our JSON response will look something like this:
{
    "data": {
        "accessToken": "YOUR_ACCESS_TOKEN",
        "refreshToken": "YOUR_REFRESH_TOKEN"
    }
}
Now let’s create a structure that will be used to decode this response. Create a file called LoginResponse in the Models folder:
import Foundation

struct LoginResponse: Decodable {
    let data: LoginResponseData
}

struct LoginResponseData: Decodable {
    let accessToken: String
    let refreshToken: String
}
Here you can see how we can easily put Decodable structures one inside another if we need to work with nested JSON.
All that is left now is to create our login action. We won’t be using any of the third-party libraries, such as Alamofire, to send our API requests (although you can totally do that if you want!), as the good old URLSession provided by Apple does the job just fine.
Create a file called LoginAction and put it in the Actions folder. It should look like this:
import Foundation

struct LoginAction {

    var parameters: LoginRequest

    func call(completion: @escaping (LoginResponse) -> Void) {

        let scheme: String = "https"
        let host: String = "base_url"
        let path = "/login"

        var components = URLComponents()
        components.scheme = scheme
        components.host = host
        components.path = path

        guard let url = components.url else {
            return
        }

        var request = URLRequest(url: url)
        request.httpMethod = "post"

        request.addValue("application/json", forHTTPHeaderField: "Content-Type")
        request.addValue("application/json", forHTTPHeaderField: "Accept")

        do {
            request.httpBody = try JSONEncoder().encode(parameters)
        } catch {
            // Error: Unable to encode request parameters
        }

        let task = URLSession.shared.dataTask(with: request) { data, _, error in
            if let data = data {
                let response = try? JSONDecoder().decode(LoginResponse.self, from: data)

                if let response = response {
                    completion(response)
                } else {
                    // Error: Unable to decode response JSON
                }
            } else {
                // Error: API request failed

                if let error = error {
                    print("Error: \(error.localizedDescription)")
                }
            }
        }
        task.resume()
    }
}
There are many interesting things to see here. First, we are creating our URL by combining three variables: scheme, host, and path. The scheme will (hopefully, if you care about security) always be https, we will set our host when we connect to a server (now it’s a hardcoded dummy value base_url), and the path is the method we are accessing (in this case, /login). These variables will generate the following url: https://base_url/login for our request.
Next, we are defining our httpMethod as post, because we are defining our /login as a POST request. You are probably starting to notice that many of these variables should not be hardcoded in this single action but passed as parameters instead. Don’t worry! We will get there. Just bear with me for now 😉
We are also adding some standard headers, so the app knows that it is working with JSON. Then, we encode our request into JSON and send it to the server with URLSession.shared.dataTask. When the response is received, we will try to decode it into our LoginResponse structure. If everything goes as expected, we will pass this decoded response in the completion handler back to our LoginViewModel. Sweet! 💪
If something goes wrong, though (JSON encoding/decoding fails, there is an API request error or something unexpected happens), we will not end up in our completion block but in one of our else error blocks instead. For now, we are not doing much if that happens. However, we will need to handle these errors later, as they happen way more often than we would like them to!
The final thing we need to do is actually connect our LoginScreen with our root view, which is the ContentView. So, we need to modify the ContentView, so it looks like this:
import SwiftUI

struct ContentView: View {
    var body: some View {
        LoginScreen()
    }
}

struct ContentView_Previews: PreviewProvider {
    static var previews: some View {
        ContentView()
    }
}
If you followed each step, your Login feature should have the following folder and file structure in your project:
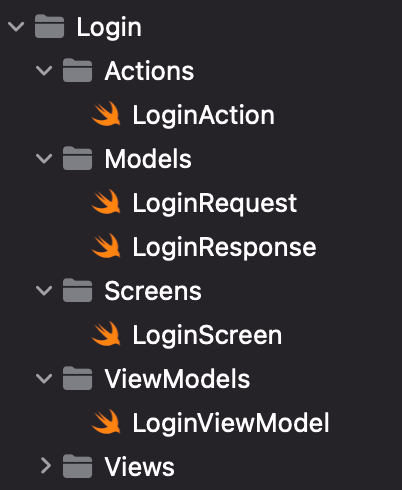
Time to run the app! If you’ve followed each step, you should see something like this:

Looking good! Of course, we cannot properly log in yet as we don’t really have an API to do so. 😅 However, we learned how to create a new feature by following the MVVM principles. We created our first UI screen, we connected our screen to a view model, and finally, we created the foundation for our first API request.
That’s a lot of work! 😌
If you want to download a project that contains everything we’ve done so far, you can do it by clicking here.
“Build your first SwiftUI app” is part of a series of articles designed to help you get started with iOS app Development.
If you have any questions on any of the above-outlined thoughts, feel free to share them in the comment section.
Click here to read Part 1.: Project setup
Click here to read Part 2.: Project Architecture
In the next part of the series, we will set up a (mock) server that will handle our API requests, so we can properly implement and test the login feature. See you soon!